The best approach for DIY'er is: "if making a laser, make it completely mirrorless."
And it is possible sometimes. Examples: superradiant nitrogen laser, superradiant
dye lasers. In other cases it is impossible (co2 laser, solid state lasers). But
even then there is a chance to avoid alignments. Example: two-prism always stable
resonator,

that exploits a property of right angle prism to return a ray in that way, that its
projection onto a plane orthogonal to the prism's main edge is exactly parallel to
the same projection of the accident ray. Or either a resonator with corner cube prism

that uses a property of the cube corner to return reflected ray parallel to the accident
ray in full 3d space (not in projections)
However it also not always possible. The necessary prisms are hard to get, especially
when they need to be made from special materials to operate with laser radiation
(ZnSe for CO2 laser or quartz for ultraviolet)
As the result we are forced to return to the bugging classical schematics - two
mirrors on the moutnts able to be adjusted, and to eat all toughnesses and complications
of the alignment process. However there is "a life on Mars planet" in the sense that
even in garage-kitchen conditions one may create a laser with classic alignable
resonator, and the laser will be operational.
The commercial laser mirror mounts are expensive. In 2011 one may find them on the
E'B_A,Y auction (sic due to robots that ban sites for the advertisment) priced
at 70 USD and more for the ones with good quality an at 20+ USD for ones having been
created also by DIY'ers but with slightly more resources than we have.
As it appears to be one may make mirror mounts by him(/her)self even without milling
machine and lathe, and without a kit of little springs.
The described here mirror mounts appeared to be usable even in making lasers with
rather low gain, they can keep position for several days and they are quite simple
to produce.
1. RESOURCES.
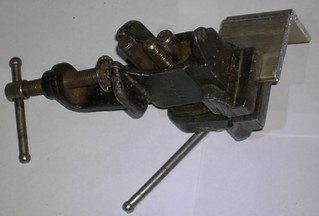
To make the simple mirror mount we'll need:
- Aluminium angle stock with a side not less than 50 mm and wall thickness not
less than 3 mm.
- metal woking hacksaw
- drill
- vise
- three M3 screws
- three M3 nuts
- 3.2-3.5 mm drilling bit
- 5.5 mm drilling bit
- 9mm drilling bit (or other diameter suitable for Your laser beam)
- kitchen round gasket (silicone one is good) of suitable diameter
- rubber glue (or other elastic glue that sticks to metal good)
All those things are on the photo below:

Also for simplicity lets assime the signs for al stock sizes as shown on the figure
below:

In general the angle stock is asymmetrical (as it is shown on the figure). It may happen
That You use a symmetrical one. In that case L=l and D=d.
That palne of the angle stock, where You intend to drill holes for alignment screws and
for the beam, we'll call the working plane. The remaining plane of the angle we'll call
'foot'.
2. ASSEMBLAGE.
- Cut two pieces having length L' from the angle stock.
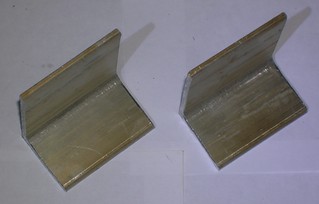
- Cut the foot from one of the obtained angles. According to the general relativity
in application to the particular case of symmetrical angle stocks the result is independent
to which side was taken as foot. Theorem is not correct for the case of assymmetric angles.
In that case the shortest side is treated as foot.
After the amputation we have one angle with Lxl sides and one aluminium square L'xL'.
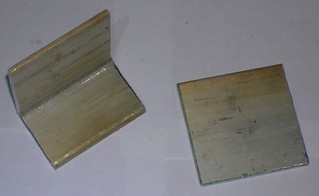
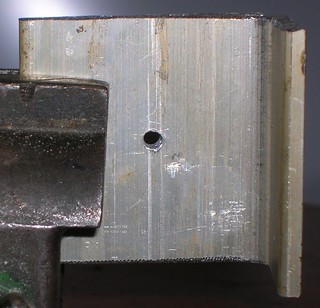
- Put the angle and the square together (as shown below), align and hold down in vise.
Mark a place where the laser beam should go through. Drill there a hole (about 3 mm
in diameter for now) in both parts in one pass.
- Using a M3 screw and nut pair attach parts together. It will help to keep them
from shifting.

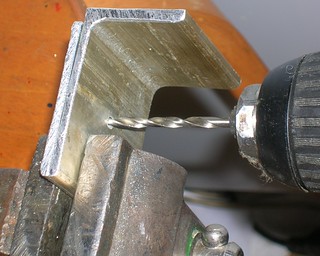
- Mark the places where You intend to place the alignment screws (3 pcs), hold down the parts in vise and drill there 3 holes with diameter slightly more than
3 mm (3.2 mm should be enough but if You haven't got that bit, You can drill
3.5 mm)
They often place the alignment screws at the vertices of equilateral triangle with
its center at the hole for laser beam. However it is optional. Simply the more
asymmetrically the screws are placed, the more difference in forces during alignment
will be. It may cause some problems later (e.g. jamming).
Place the screws as it suits Your design, keeping in mind that the longer is arm
(the distance between screws) the more precise alignment will be achievable.
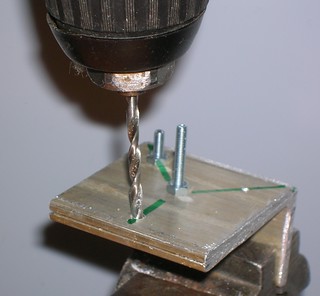
In the proces of drilling it is handy to fix parts with the screws and nuts
just after the next hole have been drilled. It will help to reduce shifting.
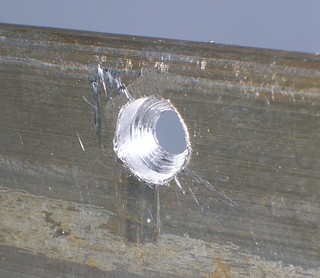
- After the all three holes (for the alignment screws) are drilled, remove the
central screw and drill the full diameter center hole (usually it will be about
10 mm).

- Remove remaining screws and detach the parts. Take the main part (the L-shaped one)
and at all alignment holes drill pts 1.5..2 mm deep and 5 mm in diameter.

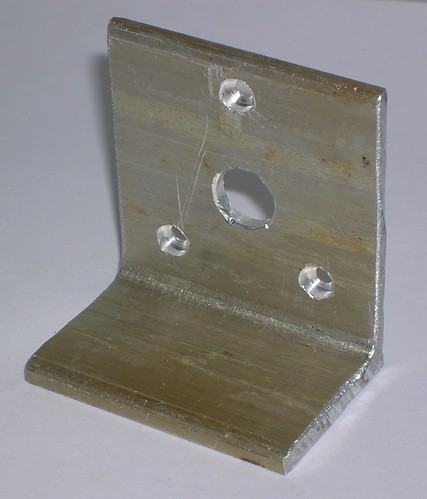
The diameter of pits should be a bit larger then the size between sides of the nut
and slightly less than the size between edges of the nut. For the most wide spread
3 mm nuts the diameter should be 5 mm. If using the other type of nuts - choose the
appropriate diameter.
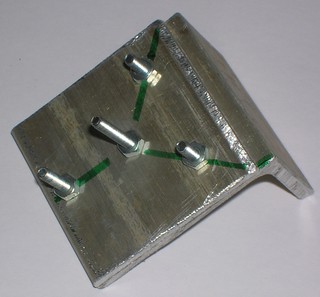
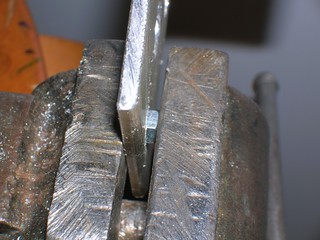
- Use the vise to press the nuts into the pits.
- If You already know where the mirror mount will be used - You may now
drill attaching holes in is foot. Otherwise it will be better to do it
afterwards 'in place'.
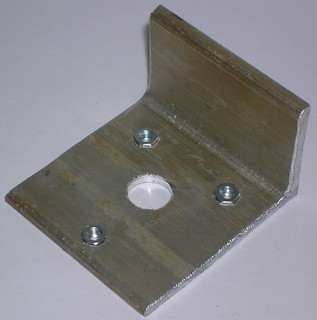
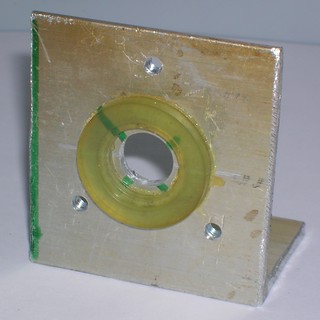
- Glue a rubber (silicon) gasket around the central hole of the mirror mount.
(Around the beam passing hole.) The gasket will serve as an elastic element
instead of springs.
- Let the glue to cure and assemble the mirror mount.
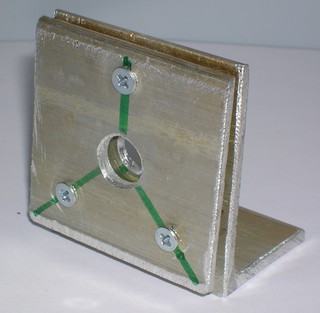
That's all. It remains only to set the mirror mount into the laser and to
attach the mirror. It is suitable to use several drops of thermoglue (glue-gun)
to hold the mirror. It keeps well, and if needed it can be rather easily removed
without any damages. However there exist other ways to attach the mirror.
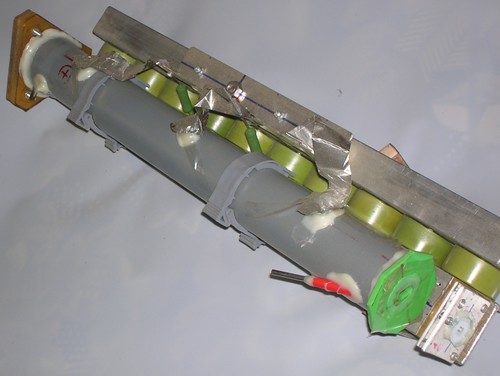
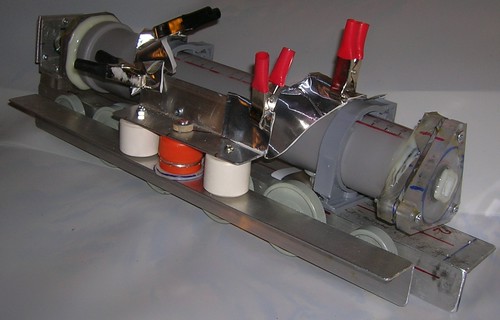
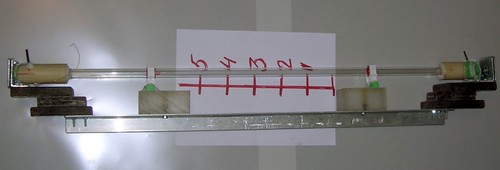
The examples of this mirror mount usage in the complete DIY lasers are below:
3. COMMENTS
The first samples of those mirror mounts were made with threading the holes
directly. However aluminium (even strengthened one) appeared to be too weak
to endure the alignment forces and the mirror mounts failed oftenly. Also
it's too hard to make the mirror mounts from a steel angle stock.
Usage of the pressed nuts has allowed to achieve nearly the same durability
as with usage of steel but easier.
Thick aluminium angle stock is rather rare. You may use steel but beware of
difficulties - to saw, to drill and to thread (yes, You will need to thread the
holes due to it will be almost impossible to press nuts there) will be hard. Using the same principles one may make even plastic mirror mounts.
However when using plastic for the design, one should remember that:
- The plastic must be hard. Perspex, epoxy forms, textolite do suit, but
even thick polyethelene or teflon won't suit.
- Thickness of the plastic should be not less than 10 mm;
- M3 nuts usually can't be attached to plastic good enough to endure alignment
forces. More fortunate choice is M5 screws and nuts. However the thread step
there is larger, so the size of mirror mounts (its arm size) should be
enlarged correspondently. I.e. the plastic mirror mounts will be larger than
metal ones.
The essence of this guide is certainly not to force You to follow it strictly.
It's rather to say: "Guys, it may be accomplished in this very simple way. It've
been tested and works." Of course You may develop Your own better designs.
<< HOME PAGE |


